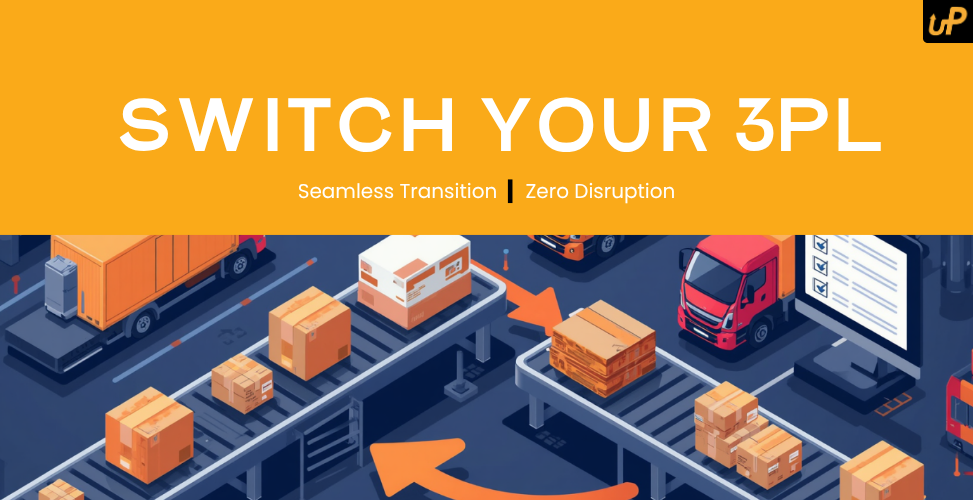
How to Switch Your 3PL Provider in Singapore Without Losing Orders
You know the feeling.
An order sits unprocessed for two days. A customer messages asking where their parcel is. You check the dashboard, and the tracking hasn't updated since yesterday morning. You chase your 3PL. They come back with a vague reply about "high volumes."
This has happened before. It'll happen again.
Moreover, somewhere between that customer message and your 3PL's non-answer, you made a decision: it's time to switch.
The good news is that switching 3PL providers in Singapore is more common than most sellers think and done properly, it doesn't have to cost you a single order. The bad news is that, done badly, a provider migration can cause more disruption than whatever problem you were running from.
This guide gives you the step-by-step plan to move cleanly, protect your orders throughout the transition, and arrive at your new provider without baggage.
Before You Start: Three Things to Sort Out First
Resist the urge to immediately start moving stock. Before anything physical happens, you need to get three things in order.
1. Check your current contract
Most 3PL contracts in Singapore include a notice period typically 30 to 60 days. Some include minimum commitment terms or early exit clauses.
-
Read your contract before having any conversation with your current provider
-
Identify the notice period and the last date you're contractually committed to
-
Check whether there are penalties for early exit or minimum volume clauses
-
Know whether you own your inventory location data and packaging materials
Do not ghost your current provider. You still need them operational during transition.
2. Do a full inventory audit
Before a unit moves, you need an accurate count of what's currently in your current 3PL's warehouse.
-
Request a full SKU-level inventory report from your current provider
-
Cross-reference it against your own purchase records and sales data
-
Flag any discrepancies now, not after you've moved out
-
Take note of any slow-moving or dead stock that may not be worth transferring
Inventory disputes between old and new providers are one of the most common and most stressful parts of a 3PL migration. Settling the count before you start is non-negotiable.
3. Identify your new provider before triggering anything
Don't serve notice on your current 3PL until your new provider is confirmed, onboarded, and ready to receive stock. The migration timeline only starts once both ends are secured.
For a structured guide on evaluating and selecting your next fulfillment partner, the post on how to choose the right fulfillment partner in Singapore covers the criteria worth checking before you commit.

Phase 1 — Weeks 1–2: Set Up Your New Provider
Sign the agreement with your new 3PL and begin onboarding before any stock moves. This phase should cover:
-
System integration — connect your new provider to your Shopee, Lazada, TikTok Shop, or Shopify store. Test that orders are flowing correctly
-
SKU mapping — every product needs to be registered in the new provider's warehouse management system with correct barcodes, weights, and dimensions
-
Packing and labeling specs — confirm how your new provider handles packing materials, fragile items, and any custom packaging requirements
-
Dispatch cut-off times — confirm when same-day dispatch is triggered and what the daily process looks like for your order volume
Nothing ships through the new provider yet. This phase is pure setup and testing.
Phase 2 — Week 2–3: Send a Test Batch of New Stock
Before transferring existing inventory, send a fresh inbound of one or two SKUs to your new provider's warehouse.
-
Place test orders through your store and let the new provider fulfill them
-
Check dispatch speed, packing quality, and tracking accuracy
-
Identify any system or process issues before full volume is involved
-
This is your quality gate, if the test batch reveals problems, you fix them here, not after 500 units have arrived
Phase 3 — Weeks 3–4: Run Both Providers Simultaneously
This is the safest approach to 3PL migration and the one most sellers skip usually to their cost.
How parallel running works:
-
New stock replenishment goes to the new provider
-
Existing stock stays with the old provider until it's depleted or transferred
-
Orders continue to fulfill from both locations depending on which SKUs are where
-
Your store's order routing needs to reflect which SKUs are where, this requires either manual management or a multichannel routing setup

Running parallel isn't free, you're paying two providers simultaneously for a period. But the cost of a week of disrupted orders on Shopee or Lazada dropped ratings, negative reviews, and the algorithmic penalty that follows is significantly higher.
Phase 4 — Week 4: Transfer Remaining Inventory
Once your new provider is proven and your fast-moving SKUs are already replenished there, transfer the remaining inventory from your old provider.
How to do this without gaps:
-
Pause new orders on the affected SKUs for the transfer window if possible (use Shopee's and Lazada's seller tools to temporarily mark items as out of stock during transfer)
-
Arrange direct warehouse-to-warehouse transfer where available reduces double handling
-
Get written confirmation from your old provider of the exact quantities released
-
Count stock on receipt at the new provider and confirm against the outbound count
-
Do not resume selling until the count is reconciled
Phase 5 — Go-Live and Provider Exit
Once all inventory is confirmed at the new provider and orders are flowing cleanly:
-
Update all system integrations to route exclusively through the new provider
-
Serve formal notice on your old provider (as per your contract terms)
-
Confirm that no outstanding orders, returns, or disputes are pending with the old provider
-
Download and archive all inventory reports, dispatch records, and transaction history from your old provider before access is closed
The Go-Live Checklist (Before You Turn Off the Old Provider)
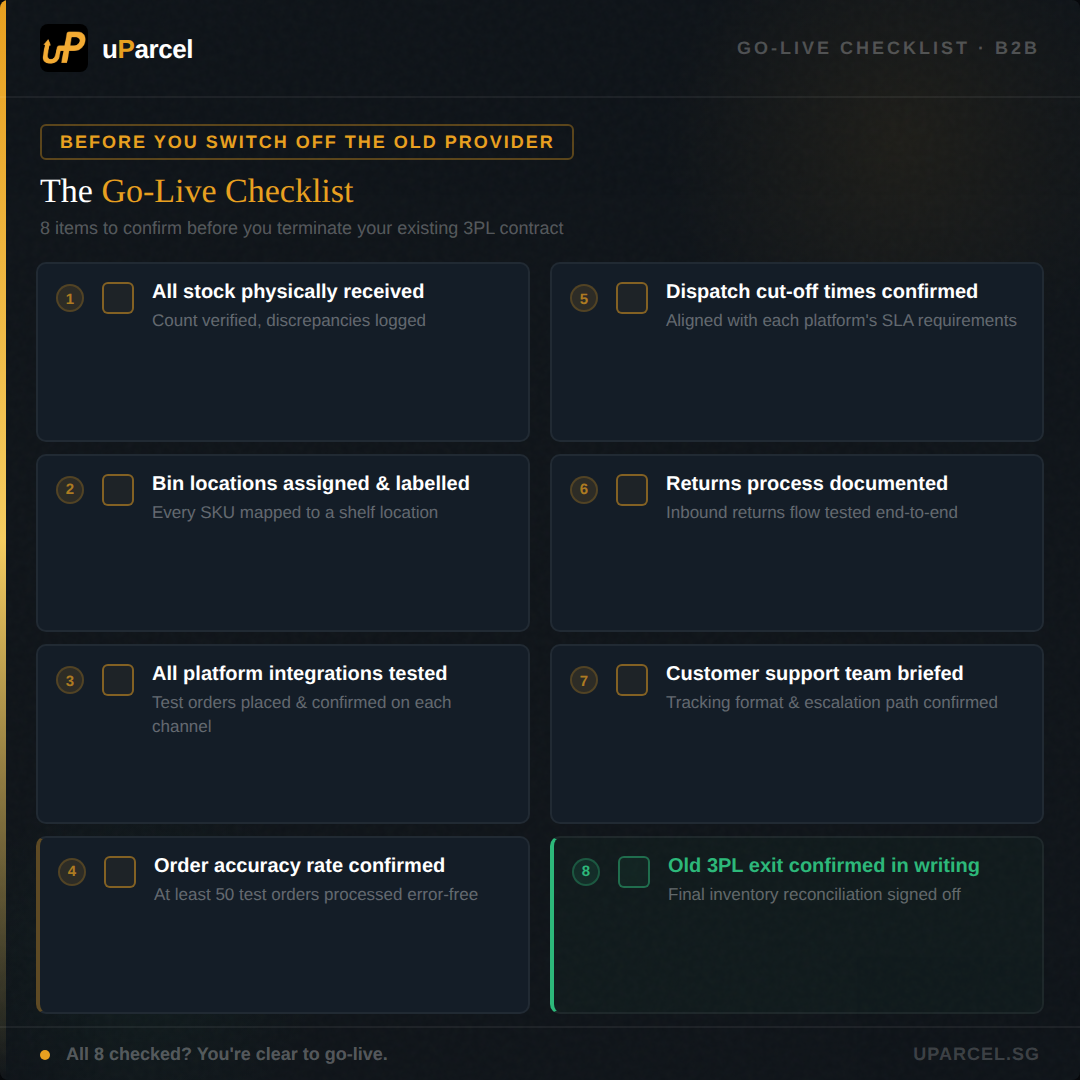
-
✅ Full inventory count reconciled at new provider
-
✅ All SKUs mapped and barcoded in new WMS
-
✅ System integrations tested, orders flowing and dispatching correctly
-
✅ Tracking updates visible to customers
-
✅ Dispatch cut-off times confirmed and working
-
✅ Returns process agreed and documented
-
✅ No open orders or pending returns at old provider
-
✅ Historical records downloaded from old provider
Mistakes That Cause Order Loss During Migration
These are the patterns that turn a manageable transition into a damaging one.
01. Serving notice before the new provider is ready
The single most common mistake. You announce you're leaving, your old provider's service drops further, and your new provider isn't operational yet. You're caught in the middle with live orders and nowhere to fulfill them.
02. Skipping the test batch
Moving all your stock to a new provider without running a test batch first means you discover problems at full scale. Always validate the new provider with a small volume before committing your full inventory.
03. Not pausing listings during stock transfer
Attempting to fulfill orders while inventory is physically in transit between warehouses creates fulfillment failures. A brief listing pause during the transfer window is less damaging than late or failed dispatch.
04. Assuming inventory counts will match
They often don't, especially after months with a provider. Disputes about missing units are far easier to resolve before you've exited. Get written confirmation of every unit before and after transfer.
05. Forgetting to update platform integrations
If your Shopee or Lazada store is still routing orders to the old provider's system after go-live, those orders won't fulfill. Confirm the integration switch explicitly, don't assume it's automatic.
How uParcel Handles New Partner Onboarding
One of the friction points sellers report when switching 3PLs is that the new provider's onboarding is slow, under documented, or leaves too much to the seller to figure out.
uParcel's ecommerce fulfillment service includes a structured onboarding process for sellers migrating from another provider covering system integration, SKU setup, inbound stock receiving, and test order validation before full go-live.
Key points relevant to sellers switching providers:
-
Same-day fulfillment processing — orders received before cut-off are dispatched the same day, which matters when you're rebuilding dispatch performance after a provider change
-
API integration with Shopee, Lazada, TikTok Shop, and Shopify — reduces manual touchpoints during and after transition
-
Island-wide delivery network — no coverage gaps that create post-switch complaints
-
4.9 Google rating across 8,500+ reviews — consistency of service is verifiable, not just claimed
The Bottom Line
Switching 3PL providers in Singapore doesn't have to mean losing orders, upsetting customers, or watching your seller ratings take a hit.
It does require a plan specifically: audit first, set up the new provider before giving notice, run both providers in parallel during transition, transfer inventory carefully, and don't go fully live until the count reconciles.
The sellers who switch cleanly are the ones who treat the migration as a project with phases, not a single event. The ones who don't who give notice in frustration and figure out the rest later are the ones who end up in a worse position than when they started.
If you're ready to explore what switching to uParcel looks like for your business, the team is happy to walk you through the onboarding process and answer questions about the transition.
Explore uParcel's ecommerce fulfillment service or reach out directly to start the conversation.
Other Blog Posts
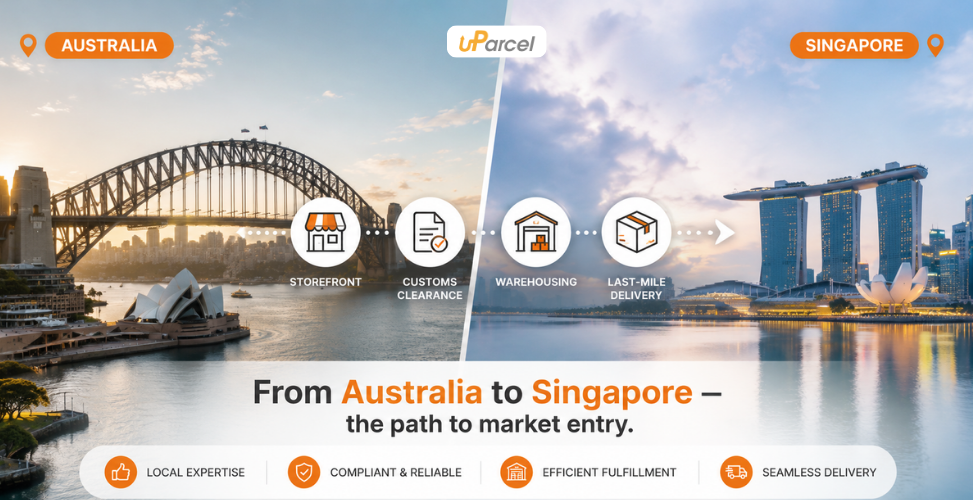
Australian Brand Selling in Singapore: The Complete Market Entry Guide
Singapore is one of the most searched destinations for Australian brands looking to expand into Asia. It's English-speaking, digitally advanced, has one of the highest consumer spending rates in the region, and serves as a launchpad for the broader Southeast Asian market. For an Australian brand selling in Singapore, the opportunity is real but so is the complexity if you go in without a clear plan. This guide walks through everything an Australian brand needs to know: why Singapore makes sense, how to register and import legally, which platforms to sell on, and how to set up fulfillment so your orders actually reach customers on time. Why Singapore Is a Strategic Market for Australian Brands Singapore is not just another export market. For Australian businesses, it offers a combination of factors that few other Asian markets can match. The Numbers Make a Compelling Case GDP per capita of SGD 82,000+ — Singapore consumers have strong purchasing power and a high appetite for premium imported goods Ecommerce penetration exceeds 70% — Singapore has one of the highest online shopping adoption rates in Southeast Asia English is the primary business and retail language — no localisation barrier for product listings, customer communications, or marketing Time zone alignment — Singapore Standard Time (UTC+8) overlaps well with both AEST and AWST, making real-time customer support manageable Australian Products Have Built-In Demand Australian-originated products carry strong perceived quality in Singapore. Categories with established demand include: 🌿 Natural health and wellness products — vitamins, supplements, herbal remedies 💄 Skincare and beauty — Australian natural beauty brands have a loyal following in Singapore 🍷 Food and beverage — Australian wine, Manuka honey, premium dairy, and specialty foods 👶 Baby and children's products — Australian safety standards are respected by Singapore parents 🏃 Activewear and outdoor gear — strong lifestyle culture in Singapore drives demand Gateway to Southeast Asia Singapore's strategic location means an Australian brand with a local presence can serve the broader SEA region. Many brands treat Singapore as the regional hub before expanding into Malaysia, Thailand, Indonesia, and beyond. Understanding the Singapore Consumer Before You Enter Market entry decisions should be driven by consumer understanding, not just opportunity size. What Singapore Shoppers Priorities Singapore consumers are informed, brand-aware, and price-conscious in a nuanced way they will pay a premium for quality, but they compare actively. Key behaviors to know: Reviews matter enormously, both on-platform ratings and social proof influence purchase decisions Fast delivery is an expectation, not a bonus same-day and next-day delivery options are standard in the Singapore ecommerce market Authenticity is valued, Australian-made or Australian-origin claims resonate, but they need to be verifiable Platform loyalty varies by category, beauty and lifestyle skew toward TikTok Shop and Shopee; electronics and general merchandise skew toward Lazada and Shopee Seasonal Peaks to Plan Around Singapore's ecommerce calendar is event-driven. Key dates for Australian brands to build around: Event Timing Notes Chinese New Year Jan/Feb High gift and premium product demand 9.9 Super Sale September Platform-wide deals; high volume 11.11 Singles' Day November Biggest sale event of the year 12.12 Year-End December Strong across all categories Step-by-Step: How Australian Brands Enter the Singapore Market Step 1 — Decide Your Business Structure in Singapore To sell legally in Singapore as a foreign company, you need a local business entity. The Accounting and Corporate Regulatory Authority (ACRA) is Singapore's business registration body. The two most common structures for overseas companies: Private Limited Company (Pte. Ltd.) — the most common choice; provides limited liability and can be 100% foreign-owned Branch Office — an extension of your Australian company; profits are taxable in Singapore, but legal liability flows back to the parent entity Key requirement: A Singapore-registered company must have at least one locally resident director. This can be a Singapore citizen, permanent resident, or an EntrePass holder. If you don't have one, registered filing agent services can fulfill this requirement. 📋 ACRA's BizFile+ portal handles all company registration online: www.acra.gov.sg Step 2 — Understand Customs and Import Requirements Importing goods from Australia into Singapore involves clearing Singapore Customs. The process is more straightforward than many markets, but there are requirements to understand: Singapore GST (9%) applies to all imported goods valued above SGD 400. For goods valued below this threshold shipped directly to consumers, GST may apply under the Overseas Vendor Registration (OVR) regime if your annual sales exceed SGD 1 million HS codes and product declarations must be accurate — incorrect classification causes clearance delays Controlled goods (health products, food, cosmetics) require additional permits from Singapore's Health Sciences Authority (HSA) or the Singapore Food Agency (SFA) before import For Australian health supplement and skincare brands specifically, HSA registration of products is a common requirement and can take 3–6 months. Build this timeline into your market entry plan. Understanding how inbound logistics and customs clearance work in Singapore is one of the most practical starting points for any overseas brand uParcel's inbound and customs support handles the import process for brands entering the Singapore market, including documentation, customs declarations, and first-mile coordination. Step 3 — Choose Your Sales Channels Singapore's ecommerce market is primarily marketplace-driven. Three platforms dominate: Shopee Singapore Largest consumer-to-consumer and B2C marketplace in Singapore Strong for health, beauty, baby, lifestyle, and everyday essentials Shopee Preferred Seller and Mall tiers offer greater visibility for established brands Live commerce feature (Shopee Live) is growing rapidly Lazada Singapore Strong for electronics, home goods, and established international brands LazMall tier provides premium brand visibility with verified badge Slightly older demographic skew compared to Shopee TikTok Shop Singapore Fast-growing platform driven by short-form video and live commerce Performs exceptionally well for beauty, wellness, and lifestyle categories Younger audience; higher engagement-to-purchase conversion when content lands well Own Website (Shopify / WooCommerce) Useful for brand building and margin protection Lower organic traffic than marketplaces; requires SEO and paid acquisition investment Best used in parallel with marketplace presence, not as a replacement Step 4 — Set Up Inventory and Fulfillment in Singapore Shipping every order directly from Australia to Singapore is not viable for a brand wanting to compete on delivery speed. Singapore consumers expect dispatch within 1–2 working days. The standard approach for Australian brands is local warehousing in Singapore: Ship a bulk consignment from Australia to Singapore (via sea freight for larger volumes, air freight for initial smaller shipments) Store inventory in a Singapore warehouse Pick, pack, and dispatch locally for each customer order This eliminates international shipping delays per order and allows you to offer same-day or next-day delivery, a competitive requirement in the Singapore market. For a full picture of how local fulfillment works for overseas sellers, this guide to local fulfillment options for overseas sellers in Singapore covers the key decisions. Step 5 — Connect Your Channels to a Fulfillment System Once inventory is in Singapore and your marketplace stores are live, you need the systems to connect them. Manual order processing at any volume above 50 orders per day becomes a bottleneck. API integration connects your Shopee, Lazada, and TikTok Shop stores directly to your fulfillment system orders flow in automatically, and tracking numbers flow back out. This removes manual data entry, reduces dispatch errors, and keeps your on-platform metrics clean. Common Mistakes Australian Brands Make Entering Singapore Learning from the mistakes of brands that have already tried this saves months of cost and delay. ❌ Shipping individual orders internationally: per-order international freight is too slow and too expensive to compete locally ❌ Underestimating HSA/SFA product registration timelines: health, food, and cosmetic products require regulatory approval before they can be sold; many brands discover this only after launch ❌ Treating Singapore like a domestic market: pricing, fulfillment expectations, and consumer behavior differ materially from Australia ❌ Launching on all platforms simultaneously without infrastructure: multi-platform selling requires an order management system; attempting it manually causes errors and late shipment flags ❌ No locally resident director arranged: without one, ACRA registration stalls before the business even starts How an Ecommerce Enabler Removes the Complexity The full market entry process business registration, product import, customs, warehouse storage, store setup, platform SEO, fulfillment, and delivery involves at least five different domains of expertise. Australian brands typically face a choice: build each piece independently (engaging a lawyer for registration, a freight forwarder for customs, a 3PL for storage, and a digital agency for store management), or find a single partner who covers the full chain. An ecommerce enabler handles the entire operational journey from a single point of contact. That means from the point your first consignment clears customs in Singapore through to the moment a parcel reaches a customer's door, the same partner is accountable. uParcel's Ecommerce Enabler is designed specifically for this use case, covering inbound and customs support, warehouse storage and inventory management, marketplace store setup and traffic optimization, order fulfillment, and island-wide last-mile delivery. For an Australian brand entering Singapore without an existing local team, this model removes the need to manage multiple vendors across a market you're still learning. Conclusion Selling in Singapore as an Australian brand is a realistic and increasingly common move but it requires planning across several fronts simultaneously: legal structure, product compliance, customs logistics, platform strategy, and fulfillment infrastructure. Brands that succeed are the ones who map out the full entry process before committing their first shipment and who set up the right operational partners before orders start arriving. Singapore's market is small in geography but significant in opportunity. For Australian brands with products that resonate with a premium-minded, digitally active consumer base, the groundwork is worth laying properly. Thinking about entering the Singapore market and want to understand the operational side in detail? uParcel's team works with overseas brands — including Australian businesses — on the full market entry process, from first shipment to first sale. Reach out to explore what the entry process looks like for your brand.
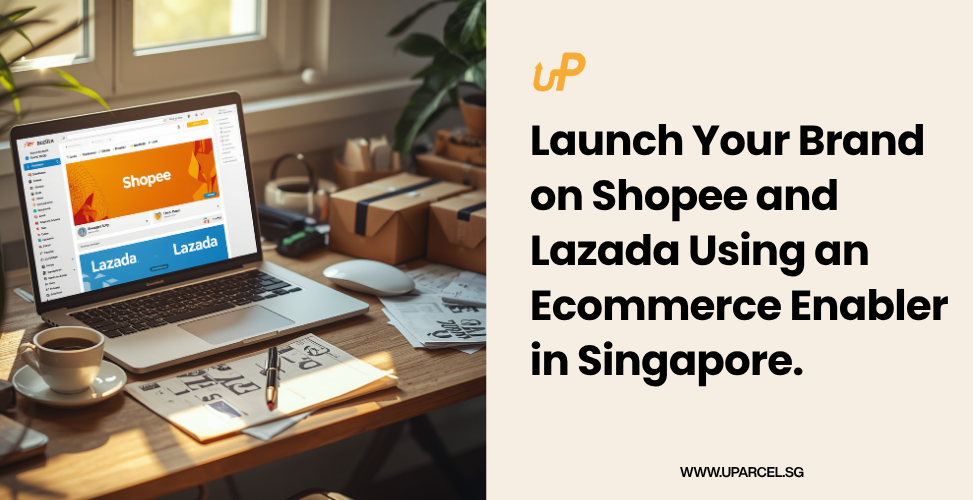
How to Launch Your Brand on Shopee and Lazada Using an Ecommerce Enabler in Singapore
Here's what nobody tells you before you launch on Shopee and Lazada. It's not the product that slows you down. It's everything else. Setting up seller accounts. Uploading listings correctly. Figuring out what photos work. Understanding how each platform's algorithm ranks new stores. Arranging warehousing. Building a fulfillment process that doesn't collapse when your first 50 orders arrive in one day. Most brands spend two to four months working through this before they make a single sale. Some never get the setup right and quietly stop trying. An ecommerce enabler changes that entirely by handling the operational layers so you can focus on your brand, your products, and your customers. This is the walkthrough of exactly how that launch looks, step by step. Why Shopee and Lazada Together, From Day One A common question: Should I start with one platform and expand later? The case for launching both simultaneously is strong. Different buyer demographics — Shopee's user base skews younger and more promotion-driven; Lazada attracts a slightly older, brand-conscious buyer. Launching on both captures both audiences from day one Algorithm cold start — new stores on both platforms take time to build sales history and ranking. Starting both clocks at the same time means both mature together Operational leverage — once your inventory, fulfillment, and listing content are set up, duplicating across platforms is marginal extra effort — especially with an enabler managing it Risk distribution — platform-specific algorithm changes, promotions, or outages affect your overall sales less when you're not dependent on a single channel Where an Ecommerce Enabler Fits In An ecommerce enabler isn't a marketing agency. It's not a courier. It's not a warehouse. It's all three plus the operational glue that holds the launch together. Think of it as a local operations team that already knows how Singapore's marketplace ecosystem works, already has the systems in place, and plugs your brand into an infrastructure that would take you 6 to 12 months to build yourself. Here's what the enabler-led launch looks like from the inside. Step 1: Business Registration and Compliance (Week 1) Before anything goes live on Shopee or Lazada, your business entity needs to be in order. For local Singapore sellers: Ensure your business is registered with ACRA — Shopee and Lazada require a valid UEN (Unique Entity Number) for seller account verification If you're selling regulated product categories (food, health supplements, cosmetics), check if additional licences apply under the Singapore Food Agency or HSA For overseas brands entering Singapore: This step is where most international brands stall without help You'll need a registered Singapore entity or a local nominee arrangement — your enabler handles this, including business registration support and customs onboarding Inbound shipments from overseas require customs clearance documentation; an enabler with local customs expertise processes this far faster than going it alone What an enabler does here: Handles the paperwork, registration support, and compliance checks so you don't spend the first month stuck in bureaucracy. Step 2: Inventory Inbound and Warehousing (Week 1–2) Your products need to be in Singapore before you can sell them. For local brands, this means getting stock into a fulfillment-ready location. For overseas brands, it means managing an international shipment, clearing customs, and placing inventory into a Singapore warehouse all before a single listing goes live. What this involves: Inbound receiving and quality check at the warehouse SKU-level inventory logging so stock is trackable from day one Product categorisation and storage placement (ambient, chilled, or temperature-controlled depending on your category) A common mistake here: Brands book a warehouse after going live. The first batch of orders arrives with nowhere to fulfil from. An enabler sets up the warehouse leg before launch, not after. Step 3: Seller Account Setup on Shopee and Lazada (Week 2) Both Shopee Seller Centre and Lazada Seller Centre have their own onboarding requirements, seller verification steps, and account configurations — and they're different from each other. What setup involves: Account creation and seller verification on both platforms Shop profile configuration, brand name, logo, banner, store description Shipping and returns settings aligned with your fulfillment capability Payment account linking for sales disbursements Product category applications (some categories require approval before listing) What an enabler does here: Completes the setup accurately the first time. Mistakes at this stage, wrong category selections, policy violations, mismatched business details can flag your account before you've made a single sale. Step 4: Product Listing Creation and Optimisation (Week 2–3) This is where brands consistently underestimate the time and skill required. Getting a product visible on Shopee and Lazada requires more than uploading a photo and a price. Both platforms rank new listings based on keyword relevance, listing completeness, and early engagement signals. What good listings require: Product photography that meets each platform's image specification (white background, minimum resolution, main image rules) Keyword-optimised titles — Shopee and Lazada have different search algorithms; the same title copy doesn't perform equally on both Detailed product descriptions with relevant search terms, specifications, and usage information Pricing strategy — initial pricing, bundle deals, and introductory offer structure that attracts early sales to build ranking What an enabler does here: Manages listing creation across both platforms copy, images, keywords, and pricing informed by what's actually performing in your product category on each platform right now. Step 5: Pre-Launch Traffic and Campaign Setup (Week 3–4) A new store with zero sales history starts at the bottom of search results. Getting early traction requires deliberate effort not waiting for organic discovery. Typical pre-launch and launch activities: Joining Shopee and Lazada's new seller promotions (both platforms run structured onboarding campaigns for new official stores) Setting up platform vouchers and bundle deals to incentivize first buyers Activating sponsored listings (paid ads within the platform) for key products to accelerate early visibility Coordinating a launch date around a platform campaign event if timing allows (11.11, 12.12, or category-specific mega sales) What an enabler does here: Plans the launch campaign calendar, manages platform ad spend, and applies for platform promotions the kind that take weeks of relationship building to get access to without an established enabler partner. Step 6: Fulfillment and Delivery Go-Live (Week 4 and ongoing) This is the moment of truth. Orders start coming in. Every single one needs to be picked, packed, and dispatched within Shopee and Lazada's SLA window or your seller metrics take an early hit that's hard to recover from. SLA realities: Shopee requires sellers to ship within 2 business days of order confirmation Lazada has similar dispatch SLA requirements with penalties for consistent late shipping Both platforms display shipping speed prominently slow dispatch affects your search ranking and buyer trust score What an enabler does here: Manages the pick-and-pack fulfillment and same-day dispatch directly connected to a delivery network that covers all of Singapore. Orders placed in the morning ship by end of day. No scrambling to find a courier after an order lands. uParcel's store management and traffic optimisation capability sits alongside its fulfillment warehousing and island-wide delivery meaning the store operations and the physical fulfillment are managed by the same team, not handed off between separate providers. Step 7: Post-Launch Optimisation (Month 2 onwards) Going live is the beginning, not the finish line. The first 60 to 90 days after launch are critical for building the sales velocity and review base that permanently improves your store's ranking position on both platforms. What post-launch optimisation covers: Monitoring keyword rankings and adjusting listing copy based on search performance Following up on early buyers for reviews (within platform rules) Analysing which products are converting and which need relisting or repricing Reviewing ad spend ROI and reallocating budget to top-performing SKUs Managing customer enquiries and returns promptly to maintain platform ratings The honest reality: Most brands who self-manage reach this stage exhausted and under-resourced. The operational demands of day-to-day store management eat into the creative and strategic work that actually grows the brand. Common Mistakes That Derail Self-Managed Launches Before wrapping up here are the patterns that consistently trip up brands who try to do this without support: ❌ Going live without stock in Singapore — processing times explode and first reviews are negative ❌ Identical listings across platforms — Shopee and Lazada have different keyword environments; copy-pasting underperforms on both ❌ No launch campaign plan — new stores with zero promotions get zero organic traffic in week one ❌ Underestimating SLA pressure — one bad dispatch week early on leaves a seller rating dent that takes months to recover ❌ Skipping the optimisation phase — launching and hoping doesn't compound; continuous listing improvement does How uParcel's Ecommerce Enabler Covers the Full Journey uParcel's Ecommerce Enabler service covers every stage described above under one relationship from business registration and customs inbound, through store setup and listing optimisation, to warehouse fulfillment and same-day delivery. What makes this operationally different is the delivery network. Most enablers coordinate logistics through third-party couriers. uParcel's last-mile delivery is its own with a 4.9 Google rating across 8,500+ reviews which means the brand experience from click to doorstep stays consistent. For brands who want to understand the cost structure before committing, the guide on ecommerce enabler costs in Singapore breaks down what to expect across different service scopes. Ready to Launch? Launching on Shopee and Lazada doesn't have to take six months of trial and error. With the right enabler, a brand that has its products ready and its business entity in order can be live on both platforms with optimised listings, warehoused inventory, and a functioning fulfillment process within four to six weeks. The brands that grow fastest on Singapore's marketplaces aren't necessarily the ones with the best products. They're the ones who got the operational foundation right from day one. If you're ready to start, the uParcel team can walk you through what an enabler-led launch looks like for your specific brand and category. Explore the Ecommerce Enabler service or reach out directly to get the conversation started.
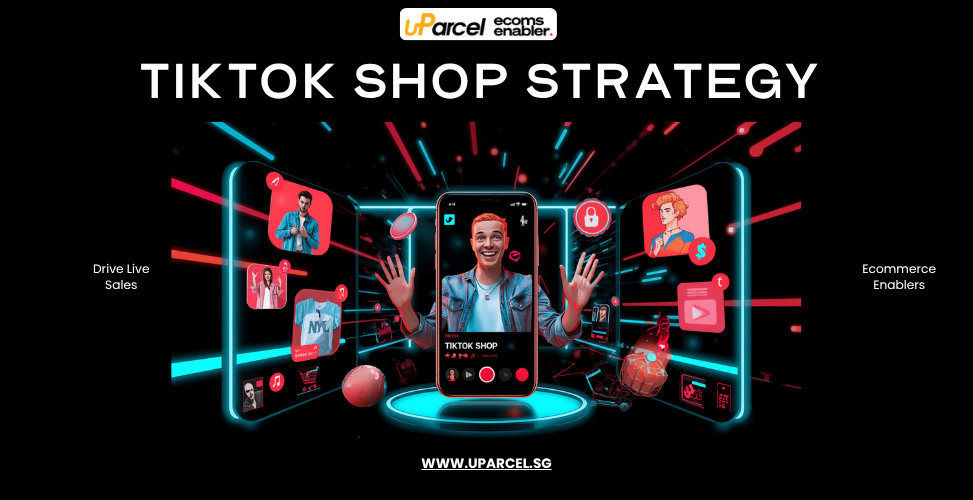
Tik Tok Shop Strategy for Singapore Brands: How Ecommerce Enablers Drive Live Commerce Sales.
It's 9 pm on a Tuesday. A Singapore skincare brand goes LIVE on TikTok Shop. Within 20 minutes, 3,000 viewers are watching. The host holds up a serum and announces a flash discount expiring in 15 minutes, and the orders start flying in. Two hours later? Over 400 orders. One session. That's live commerce. And it's reshaping how Singaporeans discover and buy products online. If you're a brand selling in Singapore and haven't cracked TikTok Shop yet, this is worth reading. We'll cover what a real strategy looks like, and why live commerce converts the way it does, and the part most brands completely miss. TikTok Shop Is Not Just Another Marketplace Most brands make the same mistake when they first approach TikTok Shop. They treat it like Shopee or Lazada with a video feature bolted on. It's not. The key difference: intent On Shopee or Lazada, buyers arrive with intent. They search, compare, and read reviews, and decide. The customer already knows what they want. TikTok flips this completely. The product finds the buyer not the other way around. A viewer is scrolling with zero intention of buying anything, and then something catches their eye. A funny host. An impressive demo. A deal too good to pass. The decision happens in seconds. That's discovery commerce. Why Singapore is primed for this 80%+ of Singapore's population are active social media users TikTok's Singapore base skews young, urban, and high-spending Categories seeing the strongest traction: beauty, health supplements, fashion, lifestyle, F&B For brands in these categories, this is an audience with real purchasing power and a genuine appetite for live shopping. Why Live Commerce Converts (When Done Right) Not every brand going LIVE hits 400 orders. A lot of brands stream to an audience of 12, feel embarrassed, and quietly give up. The difference? Strategy and execution, not luck. Here's what actually drives conversion in a live session: 01. Entertainment first, selling second The brands winning on TikTok Shop aren't running infomercials. They're running shows. The best live commerce hosts are part educator, part entertainer demonstrating products, answering questions in real time, reacting to comments, building community. Buyers buy because they're engaged. 02. Scarcity and urgency that actually feel real Flash discounts. Limited bundles. "First 50 orders get free shipping." These mechanics work in LIVE because the countdown is happening right now in front of the viewer. No static banner can replicate that feeling. 03. The algorithm rewards consistency TikTok's recommendation engine favors accounts that go LIVE regularly. A brand streaming 3× a week for two months will outrank a brand that did one great session six months ago. Live commerce isn't a campaign, it's a sustained operational activity. 04. Affiliate creators multiply your reach TikTok Shop's affiliate program lets creators promote your products in their own streams and short videos for a commission. Brands that activate even a small creator network see reach that would cost enormous sums in paid advertising to replicate. The 4 Pillars of a TikTok Shop Strategy That Works 1. 🎙 Content and Hosting Who's going LIVE for your brand? This is the most underestimated decision. A great product with a flat host under performs a mediocre product with an energetic host, every time. Whether it's an in-house staff member, a trained brand ambassador, or a contracted live commerce host, investing in your talent is non-negotiable. 2. 🤝 Affiliate and Creator Activation Start with micro-influencers (10K–100K followers). They typically have higher engagement than larger accounts and are more likely to represent your brand authentically. Set up your affiliate program and give creators the tools and samples they need to sell. 3. 🏷 Promotions and Pricing Architecture Plan your LIVE offer calendar in advance. Which sessions carry flagship products? Which feature bundles? Which uses limited-time pricing for urgency? Align these sessions with TikTok Shop's own platform campaigns events like 11.11 and 12.12 drive massive organic traffic spikes that well-prepared brands capitalize on. 4. 📦 Fulfillment and Delivery This is the one most brands leave until it's too late. (More on this below — it's the most critical pillar of all.) The Part Most Brands Forget: What Happens After the Sale Your LIVE session goes brilliantly. 400 orders in two hours. The comments are: full of love. The sales dashboard is lit up. Now what? Those 400 customers are expecting their orders. Fast. TikTok Shop buyers aren't patient the way traditional marketplace buyers might be. They bought in the heat of the moment, and they want the product before that post-purchase energy fades. Slow delivery = bad reviews. Bad reviews = lower algorithmic visibility. Lower visibility = harder to grow. It compounds quickly. What processing 400 orders actually requires ✅ Stock already picked and staged — not buried in a back room ✅ A pick-and-pack team that handles surge volume without errors ✅ A courier with same-day dispatch capability ✅ Tracking updates that reduce customer service enquiries Running all of that while also managing content, coordinating creators, and planning the next LIVE is genuinely difficult. This is where an ecommerce enabler stops being a nice-to-have. How Ecommerce Enablers Handle the Live Commerce Operation A good ecommerce enabler doesn't just help you set up a TikTok Shop account and wish you luck. The valuable ones handle the full operation that makes live commerce sustainable so you can focus on the brand and content, not the logistics. What a live commerce enabler typically manages Function What It Covers Live stream production Scheduling, setup, stream quality, host coordination Affiliate management Identifying, onboarding, and briefing creator partners Campaign planning Aligning LIVEs with platform events and seasonal peaks Post-LIVE order processing Triggering pick-and-pack as orders come in during the stream Same-day dispatch Getting orders into delivery before the cut-off The gap most enablers have and why it matters Most enablers process your orders, then hand off to a third-party courier. That introduces a dependency outside anyone's direct control. Delivery delays become someone else's problem but your buyer's negative review. uParcel's Social Live Commerce Amplifiers service closes this gap. The live commerce layer sits within the same operational structure as uParcel's fulfillment warehousing and island-wide same-day delivery network. A sale made during a LIVE at 9pm can be picked, packed, and dispatched same night no handoff, no gaps, one provider. For Singapore brands building a serious TikTok Shop presence, that end-to-end control between "sold" and "delivered" is what keeps ratings strong and buyers coming back. Getting Started: What to Do This Week No need to overhaul everything at once. Here's a practical starting point: Audit your TikTok Shop setup — are listings complete, your store verified, and your affiliate program activated? Watch three competitors' LIVE sessions — note how they structure offers and how audiences respond Map your fulfillment readiness — if you got 200 orders tonight, could you dispatch them all by tomorrow morning? Identify two or three micro-creators in your product category and pitch your affiliate program Schedule your next LIVE — commit to a regular cadence, not a one-off For a broader comparison of TikTok Shop vs Shopee and Lazada as Singapore selling channels, the guide on selling on Shopee, Lazada, and TikTok Shop in Singapore is a useful companion read. The Bottom Line TikTok Shop live commerce isn't a trend fading out it's becoming one of the primary channels through which Singapore consumers discover and buy products. The brands building durable advantages on the platform are the ones that get both sides right: The content, hosting, and affiliate network that creates the viral LIVE The warehouse, same-day dispatch, and delivery that fulfills the demand it creates One without the other doesn't work. Both together is where the real growth is. If you're ready to build a live commerce operation that works front to back, explore uParcel's Social Live Commerce service or reach out to find out what the right setup looks like for your brand.